Product
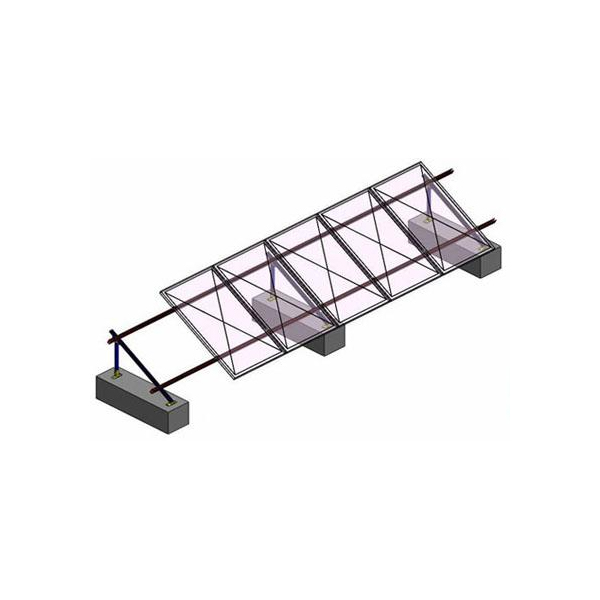
Concrete slab flat roof solar mounting
Specification
Wind Speed : < 42m/s
Snow load : 1 .4 KN/m2
Standard : AS1170.2
Degree : 0*-70
Arrangement : Vertical
Warranty: 10 years
Installation Manual
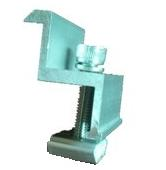
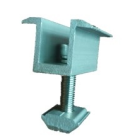
1.Install front bracket and rear post on concrete block, and then install main beam on the top of post, other terminal connect with front bracket.
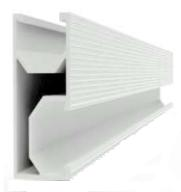
2.Install mounting rail upon main beam
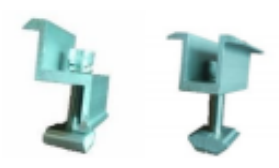
3.Install PV panels by mid clamp and end clamps.
Main parts shown as bellow:(if no concrete block, install on roof surface by expansion bolt directly. )
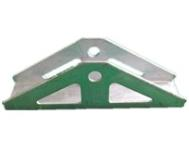
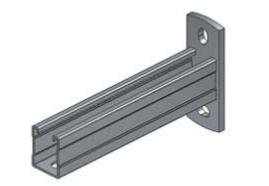
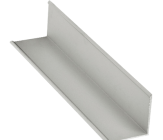
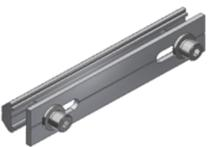
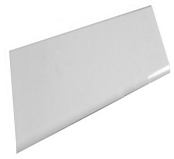
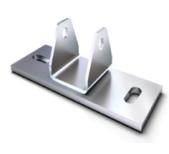
| Mounting rail/Main beam | Front bracket/Connection | Rear Post | End clamp | Mid clamp kit |
 |
 |
 |
 |
 |
By customers’ different requirements, also we can provide other types as bellow:
Simple triangle solar mounting system (With lowest side of PV panel height demand)
Also it’s triangle structure, just only we added front post which instead of front bracket.
By this type, mounting brackets will be very steady, and ensure resist big wind and snow etc.
Specification:
Wind Speed :< 42m/s
Degree :0°-70
Installation Manual:
1.Install front post and rear post on concrete block by hex bolt , and then install main beam on the top of posts by connection parts.
2.Install mounting rail upon main beam
3.Install PV panels by mid clamp and end clamps.

Main parts shown as bellow: (According to the distance between 2 front/rear posts, we need consider to add back support or not )
| Mounting rail/Main beam | Connection | Front Post 、Rear Post | End clamp kit | Mid clamp kit |
| |
|
|
|
|
C-channel structure triangle solar mounting system (No height demand, lowest side of PV panel from GL)
This type solar mounting brackets is very steady and no need to destroy rooftop.
When installed, use concrete blocks as ballast to fix all solar mounting structure, easy to install and save cost.
Specification :
Wind Speed : < 42m/s
Snow load : 1.4 KN/m2
Standard : AS1170.2
Degree : 0°-70
Arrangement : Vertical
Warranty: 10 years
Installation Manual :
1.Install front bracket and rear post on ballast beam by connection, and then install
main beam on top of post, another end connect with front bracket.
2.Install mounting rail upon main beam by hex bolt and square nut.
3.Install PV panels by mid clamp and end clamps.

Main parts shown as bellow:
| Mounting rail, Main beam, Rear Post | Front bracket, Connection | Down Beam | End clamp kit | Mid clamp kit |
 |
|
|
|
|
C-channel structure triangle solar mounting system (With height demand, lowest side of PV panel from GL)
For this type solar mounting structure, we need to install ballast beam with vertical at first,
and when all triangle brackets installed completely, we need to install secondary ballast beam again.
Specification:
Wind Speed : < 42m/s
Snow load : 1.4 KN/m2
Standard : AS1170.2
Degree : 0°-70
Arrangement : Vertical
Warranty: 10 years
Installation Manual :
1. Install ballast beam first, and then install front post and rear post on beam, and then install main beam on top of posts.
2. Install mounting rail upon main beam by hex bolts and square nuts.
3. Install PV panels by mid clamp and end clamps.
4. Install secondary beam with landscape, and then use concrete block as ballast to fix all structure.

Main parts shown as bellow:
| Front Post, Rear Post | Mounting rail、Main beam | Ballast Beam | End clamp kit | Mid clamp kit |
| |
|
 |
|
|
Simple aluminum alloy triangle structure solar mounting system
Mainly this type solar mounting system used for flat roof which area nearby sea.
When installed, use concrete blocks as ballast to fix all solar mounting structure, no need to drill roof surface.
Specification:
Wind Speed : < 42m/s
Snow load : 1.4 KN/m2
Standard : AS1170.2
Degree : 0°-70
Arrangement : Vertical
Warranty: 10 years
Installation Manual:
1. Install triangle mount kit, which include bottom beam, main beam and rear post . All parts connected by bolts group.
2.Install mounting rail upon main beam by L-connection or bolts group directly.
3.Install PV panels by mid clamp and end clamps.

Main parts shown as bellow (Splice used for each2 rails connected)
| Triangle mount kit | Mounting rail | Splice | End clamp kit | Mid clamp kit |
 |
 |
 |
|
|
As bellow, Chasun Solar provide some other types of flat roof solar mounting
system Two rows with landscape solar mounting system
| Specification:
Wind Speed :< 42m/s Degree :10°-70 Installation Manual: |
Snow load :1.4 KN/m2
Arrangement :Vertical |
Standard :AS1170.2
Warranty:10 years |
| 1.Install ballast beam, and then install front bracket and rear post on this beam, and then install main beam on top of post, another end connect front bracket.2.Install mounting rail upon main beam, and then install secondary ballast beam on last ballast beams. 3.Install PV panels by mid clamp and end clamps. | ||

Main parts shown as bellow:
| Main beam, Rear Post | Front bracket、Connection | Ballast beam | End clamp kit | Mid clamp kit |
| |
|
|
|
|
One row with landscape solar mounting system- ballast type
Some area with big wind, Chasun Solar will provide one solution as bellow:
One row with landscape solar mounting system- ballast type
By this type, make all mounting structure steady and avoid big wind speed.
| Specification:
Wind Speed :< 42m/s Degree :0°-70 Installation Manual: |
Snow load :1.4 KN/m2
Arrangement :Horizontal |
Standard :AS1170.2
Warranty:10 years |
| 1.Install bottom beam first, and then install front bracket and rear post on beam; 2.Install ballast beam upon bottom beam, and then use block as ballast
3.And then install PV panels on top of rear post and front bracket directly. Install windshield back of PV panels finally. (Here no need to use mounting rail) |
||

Main parts shown as bellow
| Ballast beam 、Bottom Beam 、Rear Post | Front bracket | Deflector | Connection part | End clamp/Mid clamp kit |
| |
|
 |
 |
 |